This blog documents the modifications necessary to get seaworthy (warts and all), then the adventures (hopefully) on board our Trailer Sailer 6.1 metre Jarcat6 Catamaran, Kismet.

Saturday 27 July 2019

Shelves on Port Side

We decided to have a single 55mm wide shelf running just under the cabin top for the full length of the port hull. This will be for those odd knick-a-knacks like keys, phones (temporarily), companionway locks etc.
Sorry, no pics of the top shelf construction but it's the same as that lower one following.

Next, the lower shelves. These were measured so the forward 1200mm of the shelf fitted Decor containers which have a 90mm base. The rear shelf 1200mm was made for two expanding Silicone wash "bowls" (one of them is rectangular).

I made the shelves from 6mm ply, then glued 8mm tri-quad to the edge. I then glued a 30mm x 3mm rounded piece to the vertical edge. It took some gymnastics with clamps to hold everything in place. The glue I have used almost thoughout the following posts is Parfix Builders Adhesive.


I sanded the top rounded edge so its more fully rounded and less likely to chip.

The shelves were given three coats of Monocel Gold (Marine Grade) - Exterior Wood Varnish in Gloss. I like this product as it's turps cleanup and the water based one I've recently tried causes ply to warp.

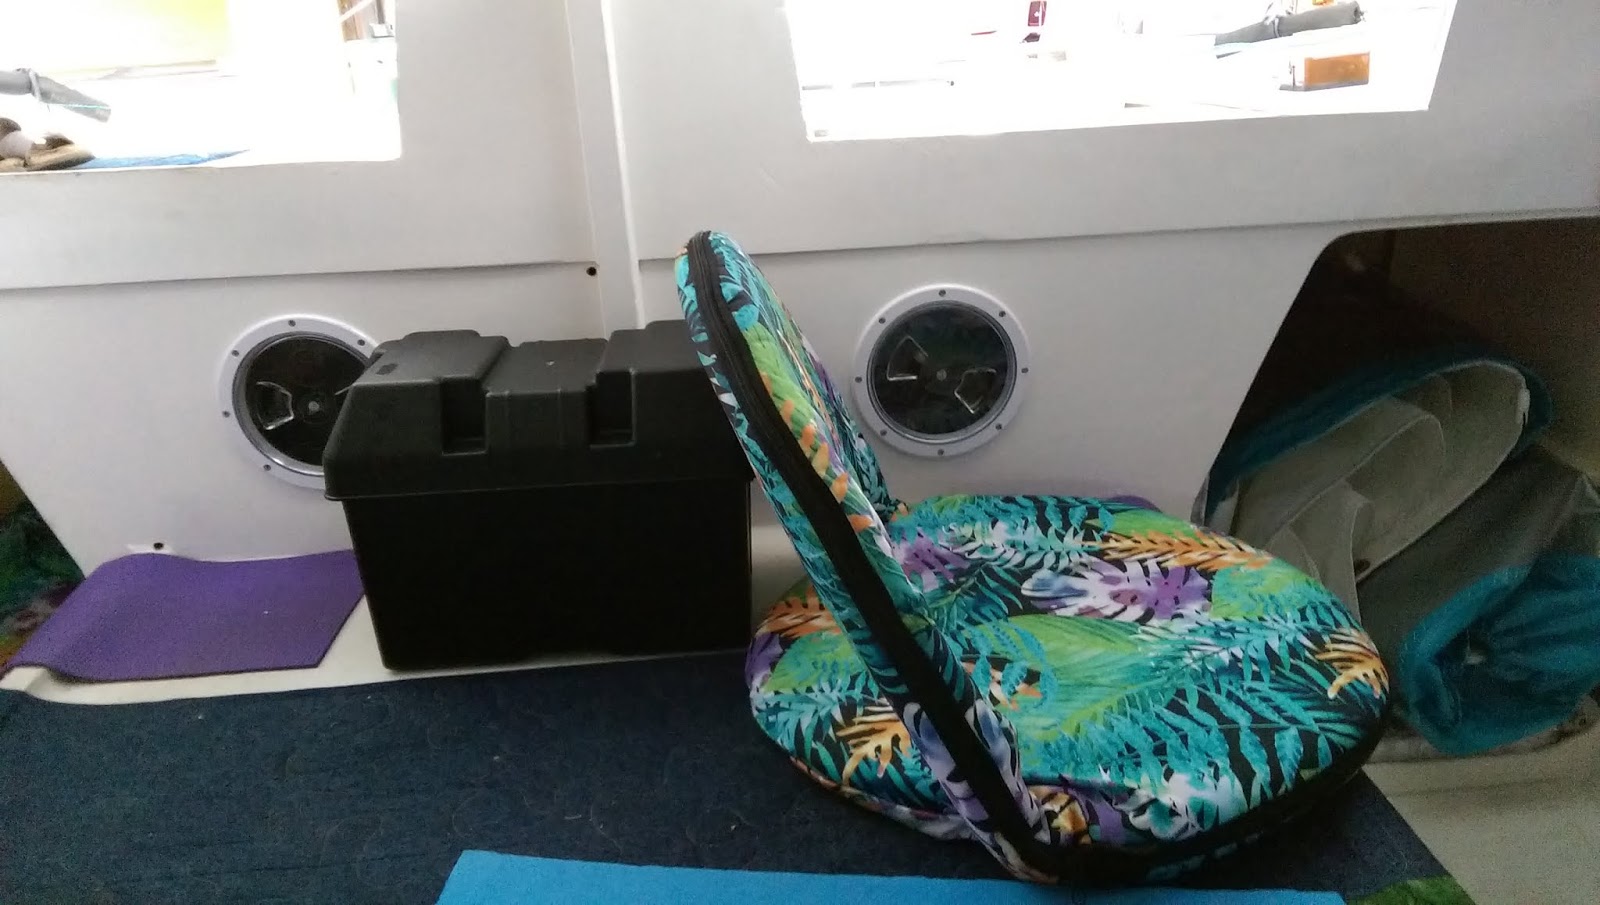
Plastic crate, battery box, plastic bucket and chuck of wood - holds the end of the shelf in position while the glue sets. Note the grey hull-liner installed on port and starboard sides above the stringer.

Some screws help the shelf stay in place while the glue sets as well

At around about the same time I added the hardwood vertical spacers to the table supports to both support the top shelf and ensure the tables were the correct distance out from the hull and lower shelf.

The rear lower shelf is fastened to the four vertical tables supports (more later), but the front shelf had nothing handy and I definitely did NOT want to place fasteners into the stringers of very light timber. So, I epoxied four pieces of 75 x 40 x 12mm hardwood to the hull and sandwiched the shelf between these and the stringer - as follows...

You can't see it in the picture but you can see the interesting use of clamps used as push-clamps in the pic. The shelf has four of 80 x 40 x 5mm rounded trim glued underneath to which is screwed four right angle 50 x 50mm right angle stainless steel shelf brackets. These were then screwed to the hardwood not-yet glued to the hull, adjusted for correct fit (read bend the bracket) then the hardwood epoxied to the hull and push-clamped. I exited the boat that day very gingerly.

Thursday 11 July 2019

Table Supports and Battery Placement

I have glued in the four vertical drop-down table supports. It was a challenge getting them vertical in two planes and flat (facing viewer) on a plane as well.

The aluminium curtain rod is temporary and helps hold the supports in place to make a flat plane.
The support are 400mm apart and will allow a 100mm gap between the tables.

The next step is a 50mm shelf running the length of the cabin where the cabin roof joins the hull (at the top of the supports).
After that there will be four 18mm pieces that space the table brackets out a little more then the stainless steel hinged brackets. The tables should drop down almost vertically so they are not in the way. There will be a lower ply shelf glued to the stringer - I'm a little worried about the table supports making outward force on the stringer - but with the ply, it should be supported well.

The table tops will be 60mm down from the top shelf which allows our 12V faucet (mounted on the shelf) to just be high enough for the silicone compressible wash-up dish to go on the table - it also sets the tables at a good height for seating.


Meanwhile we have purchased a 100AH LiFePO4 (Lithium) battery which only weights 13.8kg. This will be placed on the bridge deck at the foot of the bed so it's close to the power centre of the boat. (Later note: I didn't end up putting the battery on the bridge deck. I mounted it on the floor of the starboard hull as far forward as possible.)

The off-centre nature of the placement allow for one of our folding chairs to comfortable be used on the aft drop-down table.

This is an alternative where it's a little closer to the centre.

I'll epoxy some hardwood to the bed to hold it in place and provide for the strap.