This blog documents the modifications necessary to get seaworthy (warts and all), then the adventures (hopefully) on board our Trailer Sailer 6.1 metre Jarcat6 Catamaran, Kismet.

Sunday 23 December 2018

Chainplates - The actual Wedges

The wedges that match the chainplate strap angle to the hull were epoxied into position the day before yesterday. I epoxied the chainplate extensions on yesterday - sorry forgot to take pics today.

Today we drilled the 6mm holes (from the inside) through the hardwood and hull.
Everything went really well - meaning nothing broke away or fell off. I'm very happy with the strength although it could look a bit better cosmetically on the inside.

I'll get pics of the extension pieces next time I'm at the boat. It's Christmas eve day tomorrow so I'm not sure if I'll get there.
Next is re-mounting the main traveller - drilling all the holes again, sealing the screws in with epoxy and bedding in the I-beam with Sikaflex 291.

Starboard.

Port

Thursday 6 December 2018

Chainplate Support Epoxied to Hulls

The first support hardwood is epoxied on.
Starboard side.
Port side.

My work area - at least half of it. I'm using a chunk of core flute as a spill-catcher.

Top tiller support.


The chainplate epoxy job wasn't perfect. The next morning I visited the boat to clean up the epoxy and I reckon the bottom 2/3 are solidly bonded to the hull (correct ooze) but there are probably a few little voids at the top 1/3.

I used the two-part process where the pieces are coated with un-thickened epoxy then then left a little while and the thickened then used. Because I'm using such a slow hardener (the BoteCote non-yellowing one) the unthickened didn't really tack-off. The thicker stuff slumped a bit. I'm quite sure I couldn't move it with a Jemmy bar, so I'm not too worried.

So next stage (when our mini-heatwave subsides in a day or so) is fabricate the weird hardwood wedge shapes between the bit I just glued on and the stainless steel. Weird because the two sides are different.

Tuesday 4 December 2018

Stronger Tiller Pivot

The tiller pivot on Kismet is rather weak. The only pivot is a rudder pintle bracket with an 8mm bolt going through the tiller then the bracket. The top of the bolt is unsupported.

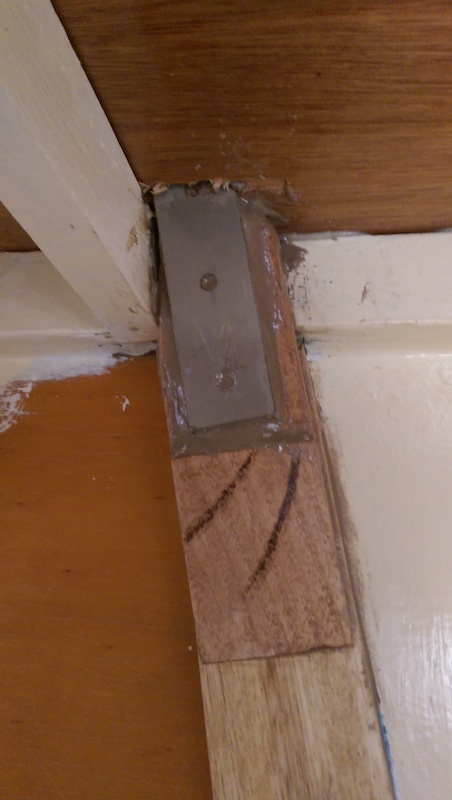
On William's (son) say so I have made a timber fitting the same shape as the lower one. This will be epoxied to the transom 47mm above the original (lower) one. We will then fit another rudder pintle on the new piece of timber (after painting etc.) - then use a longer bolt.

In order to ensure I glue it on in the correct place I used a few pieces of scrap wood to get the alignment right. As usual the existing support timber ISN'T ON STRAIGHT. So I've lifted the right hand side of the new piece about 2mm as a fudge. Not enough to notice that it's not parallel to the other one, and not enough to notice that it's not parallel with the top of the transom (just don't look too hard).

The paintbrush handle is the right size to wedge the new support onto the transom when I epoxy it.
I've put the pivot bolt back in temporarily to support my "paintbrush clamp".


I've since replaced the piece of masking tape I tore while sanding back the paint.

These pictures will help remind me how I am going to clamp it - hopefully when I do the chainplate timber tomorrow.

This is how I left it today.

Chainplate wedge stage one

Kismet in storage with my $85 eBay telescopic ladder. (Since taking this picture I have since roped the ladder to the boat for a bit of security while getting on and off.)

Today I managed to trim down the port side chainplate stage one wedge to allow the extension stainless steel to fit. I don't need to do this to the starboard one as it clears OK. I.E. The bottom of the new chainplate extension doesn't quite touch the timber piece.

Makeshift workbench.

This is my cut-down chainplate extension temporarily bolted on so that I can get the taper correct.
Method: Measure for fit, get off boat, chisel and dreadnought (wood file), get on boat - repeat...

Once these timber bits are epoxied to the hulls, the next step is to accurately manufacture a timber wedge shape to fill the void behind the stainless steel bits. Again, different for each side.

Bye Kismet, see you tomorrow. I'm off to water our oversewn front lawn.